Isnt That Charming
  • Adorn
    • Outfits
    • Ways To Wear
    • Beauty
    • Fave Finds
  • Create
    • Career + Blogging
    • Photography
  • Cultivate
    • Health + Wellness
    • Mindfulness
  • Explore
    • Destination Guides
    • Pure Michigan
    • Tips + Inspo
  • Mother
    • Parenting
    • Pregnancy
    • Fave Products
  • Nest
    • Home + Decor
    • Room Reveals
    • Entertaining
    • Food + Drink
Facebook 0 Likes
Twitter 0 Followers
Instagram 0 Followers
Pinterest 5K Followers
Bloglovin 0
Subscription Form
  • About
  • The Manifesto
  • FAQ + Contact
  • Shop Daily Charms
Isnt That Charming
Isnt That Charming
  • Adorn
    • Outfits
    • Ways To Wear
    • Beauty
    • Fave Finds
  • Create
    • Career + Blogging
    • Photography
  • Cultivate
    • Health + Wellness
    • Mindfulness
  • Explore
    • Destination Guides
    • Pure Michigan
    • Tips + Inspo
  • Mother
    • Parenting
    • Pregnancy
    • Fave Products
  • Nest
    • Home + Decor
    • Room Reveals
    • Entertaining
    • Food + Drink
  • Holiday

DIY Gift Giving :: Light Bulb Vase

  • 2 minute read
Total
0
Shares
0
0
0
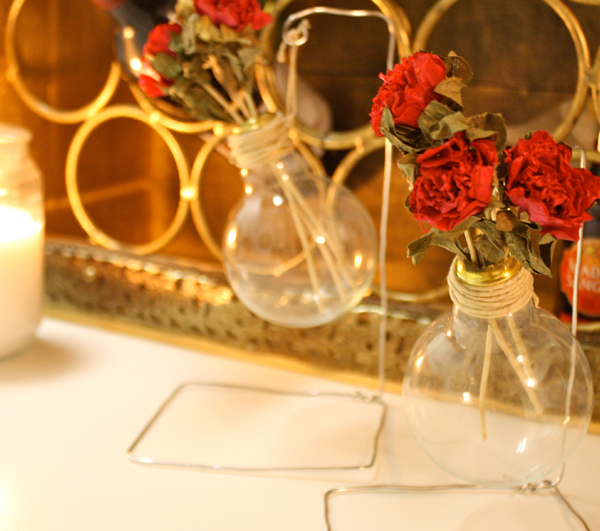
Hollowed-out light bulbs make for clever little terrariums. Molding a wire stand, adding twine and hanging the production further transforms it into a vase that is nothing short of elegant.
A light bulb vase is the perfect artistic gift to display on desks, countertops & coffee tables.
Just don’t send it down the chimney with Santa – it’s a bit fragile.
Directions after the jump!

Materials Needed:
1. Light Bulb
2. Thin screwdriver, wire cutters, protective goggles
3. Tacky Glue
4. Wire
5. Twine
To hollow the light bulb (never use a fluorescent bulb – the powder inside is toxic) start by removing the silver solder point. I used scissors and pried the ends up but you can use the screwdriver if you find it easier.
Once that is removed, take the screwdriver and place it inside the bulb. Start to slowly, but firmly, move it around until you crack the black glass insulator.
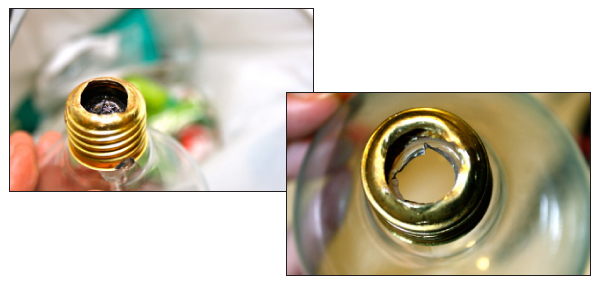
Keep slowly breaking the black insulator glass until you’ve removed it all. Be very careful – the breaks will be small and glass is likely to get everywhere. Wear goggles to use extra caution.
Once this is removed, crack the inside bulb materials with your screwdriver and remove the pieces.
This is a good step-by-step for hollowing out a light bulb if you need additional detail & direction.
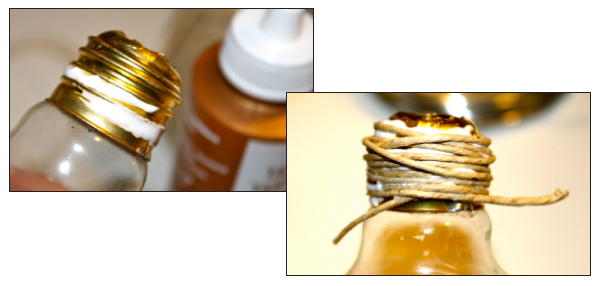
Take the tacky glue and place it around the top of the bulb. Wrap the twine around the top. The tacky glue will try clear so don’t worry about white showing.
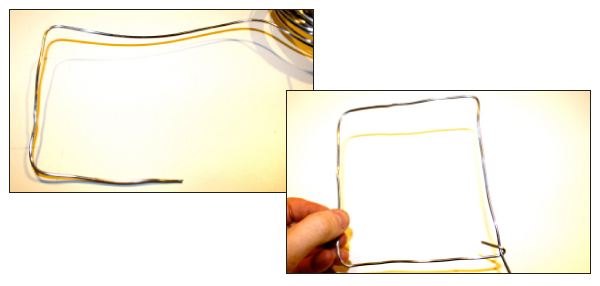
While you are waiting for the tacky glue to dry, you can build your stand. Take the wire and shape it into a square. Once all four sides are created, wrap one end to hold the foundation in place. Keep the other end long.
Measure how high you want your stand. Cut the wire accordingly. Curl the end up so that it creates a circle “hook”.
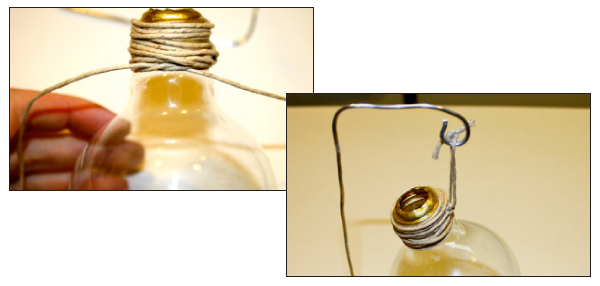
After the glue on the bulb has dried, take another piece of twine and wrap it around the top. Tie it in a double knot so that it stays, keeping the ends long. Take the ends and create another double knot so that you’re able to hang the bulb.
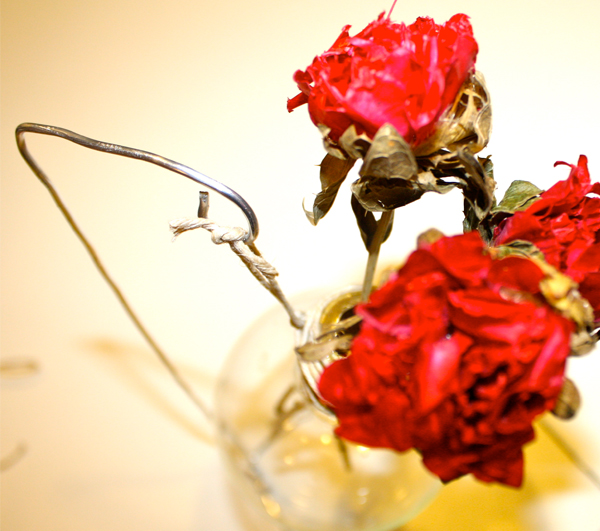
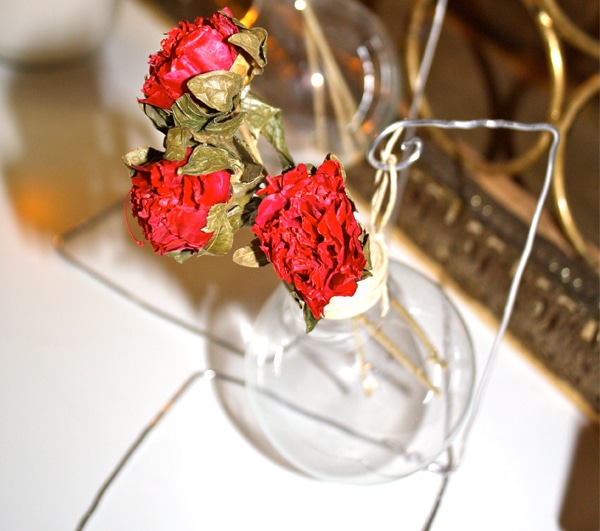
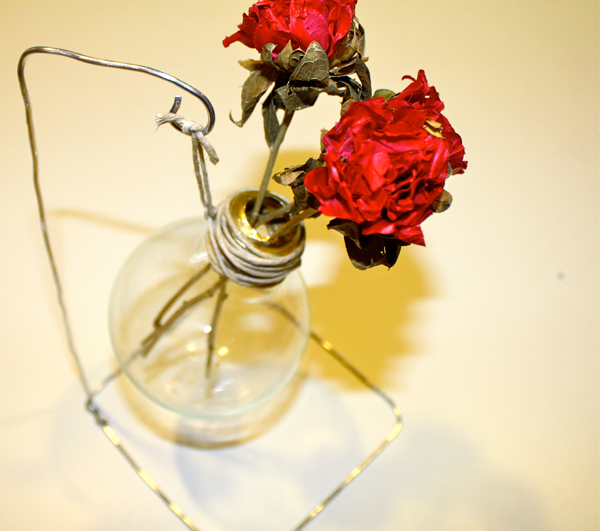
Add in dried flowers and you’re done!
You can also use water + real plants if you’d like.
Total
0
Shares
Share 0
Tweet 0
Pin it 0
Related Topics
  • DIY
  • holidays
Emily | Isn't That Charming

The Next Best Thing To Snail Mail

Never miss a post when you sign up for our weekly emails. Includes exclusive content just for subscribers!

You May Also Like
Gift Ideas For Men
View Post
  • Holiday

Charming Gift Ideas For Men

Charming Gift Ideas For The Home
View Post
  • Holiday

Charming Gift Ideas For The Home

Holiday Gift Ideas for Her
View Post
  • Holiday

Charming Holiday Gift Ideas for Her

Holiday Gift Ideas For Kids
View Post
  • Holiday

Charming Holiday Gift Ideas For Kids

charities to donate to | Our Familys Favorite Charitable Tradition
View Post
  • Holiday
  • Mindfulness

Our Family’s Favorite Charitable Tradition

tips for a more balanced holiday
View Post
  • Health + Wellness
  • Holiday
  • Mindfulness
  • Parenting

3 Changes We Made For A More Balanced Holiday

View Post
  • Holiday
  • Mindfulness

3 Conversation Tips For When You’re At The Next Holiday Party

View Post
  • Holiday

Gift Guide – Personal Wish List

15 comments
  1. Thread. The. Needle says:
    December 11, 2012 at 2:48 pm

    this is so creative Emily, I was wandering around PaperSource last night hoping something would come to me..ug where do you think of these awesome things 🙂

    Reply
  2. ChatterBlossom says:
    December 11, 2012 at 2:55 pm

    I really love these! So pretty and rustic!
    Jamie
    http://chatterblossom.blogspot.com/

    Reply
  3. alongobucco says:
    December 11, 2012 at 4:43 pm

    I made these when I moved into my current apartment! They’re such a fun, simple DIY that add so much character.

    Alyssa
    The Glossy Life

    Reply
  4. Zhanna Frid says:
    December 12, 2012 at 12:15 am

    Such a cute idea and I love that its easy!
    XO,
    Zhanna
    http://www.lifeandbows.com

    Reply
  5. Albertina M. Cisneros says:
    December 12, 2012 at 12:38 am

    love!! what a great idea and it looks great.

    Reply
  6. Colleen @ TwoDelighted says:
    December 12, 2012 at 1:15 am

    Love this! Such a fantastic idea!

    Reply
  7. Michelle Jiafang says:
    December 12, 2012 at 1:39 am

    Chanced upon your blog and enjoy reading it!

    Reply
  8. soanthro.com says:
    December 12, 2012 at 3:50 am

    This is SO sweet and creative, can’t believe that’s what they’re made out of!

    xx, Emily
    http://soanthro.com

    Reply
  9. Jenn D says:
    December 12, 2012 at 4:23 am

    These came out so cute! I’d love to have one at my desk, but I feel like I’m way too clumsy to take this on haha

    Reply
  10. Brynn {chartreuse and a twist} says:
    December 12, 2012 at 4:54 am

    yes, it does look like we both have bulbs on the brain today 🙂 so adorable! absolutely love this, emily!!! XO brynn

    Reply
  11. Amy Soto says:
    December 12, 2012 at 6:38 am

    This is adorable! I absolutely love this idea!

    Would you like to stay connected through GFC and Bloglovin?
    Xo Amy
    http://stylechocolatechip.blogspot.com

    Reply
  12. Jessica Mattioli says:
    December 12, 2012 at 12:23 pm

    Love this!!
    Would you like to follow each other on bloglovin and facebook? Let me know!

    The Fashion Heels
    Facebook
    Bloglovin
    Twitter

    Reply
  13. rooth says:
    December 12, 2012 at 1:50 pm

    That’s so delicate and quite lovely – great DIY idea

    Reply
  14. Abbie says:
    December 12, 2012 at 10:39 pm

    Such a cool idea!! So different! xx

    fashiontatt.blogspot.com

    Reply
  15. Alphonse Daigle says:
    January 9, 2013 at 1:14 pm

    Love the idea! It’s simple yet original. I might use crystal bulbs for this project to add decorative and ornamental qualities. I just hope that I don’t get careless and smash them. LOL.

    Alphonse Daigle

    Reply

Leave a Reply Cancel reply

Your email address will not be published. Required fields are marked *

Amazing Accessories
Turn off your ad blocker to view content
Social Links
Facebook 0 Likes
Twitter 0 Followers
Instagram 0 Followers
Pinterest 5K Followers
Falling Into Fall
Turn off your ad blocker to view content

Let's stay in touch!

Keep up with the latest updates from Isn't That Charming.

  • About
  • The Manifesto
  • FAQ + Contact
  • Legal
  • Shop Daily Charms
Facebook 0 Likes
Twitter 0 Followers
Instagram 0 Followers
Pinterest 5K Followers
Bloglovin 0

Input your search keywords and press Enter.


Don’t want to miss out on any Isn’t That Charming content?
Sign up today to receive weekly updates right to your inbox!

×